Difference between revisions of "DICOM CD workflow"
Vmarchetti (Talk | contribs) |
Vmarchetti (Talk | contribs) (Defined 3 step workflow and defined some of the links) |
||
| Line 4: | Line 4: | ||
[http://www.kshell.com/pages/MedDICOMDemo20161018/index2.xhtml Truncated Image Set] | [http://www.kshell.com/pages/MedDICOMDemo20161018/index2.xhtml Truncated Image Set] | ||
| + | ==Workflow== | ||
| + | The workflow to prepare an X3DOM volume rendering from a set of DICOM images contains these steps: | ||
| + | |||
| + | ===1. Selection of Images=== | ||
| + | From the set of DICOM images select a set of images which represent a sequence of parallel slices taken at uniform spacing through the imaged volume. Each image in the set should have compatible (equivalent) imaging characteristics and image size. | ||
| + | |||
| + | ===2. Generating 3D Texture=== | ||
| + | * [http://www.web3d.org/documents/specifications/19775-1/V3.3/Part01/components/volume.html#VolumeData VolumeData] node. The geometric size of the rendered volume is defined in the dimensions attribute of this node. This node combines volumetric data represented by a 3D texture (abstract node [http://www.web3d.org/documents/specifications/19775-1/V3.3/Part01/components/texture3D.html#X3DTexture3DNode X3DTexture3DNode]) and volume rendering style information as an abstract [http://www.web3d.org/documents/specifications/19775-1/V3.3/Part01/components/volume.html#X3DVolumeRenderStyleNode X3DVolumeRenderStyleNode] | ||
| + | * [http://doc.x3dom.org/author/Texturing/ImageTextureAtlas.html ImageTextureAtlas] is an X3DOM extension node. It is not part of the X3D v 3.3 standard but has the attributes required to be considered a descendand node of X3DTexture3DNode. This node contains an attribute url which is a link to a standard 2D image which through tiling contains a sequence of the 2D slices. | ||
| + | ===3. Creating X3DOM web content=== | ||
Latest revision as of 05:14, 28 October 2016
A description of the workflow to produce the medical image rendered in X3DOM here, from the CD containing results of MRI scans.
Complete Image Set Truncated Image Set
Contents
Workflow
The workflow to prepare an X3DOM volume rendering from a set of DICOM images contains these steps:
1. Selection of Images
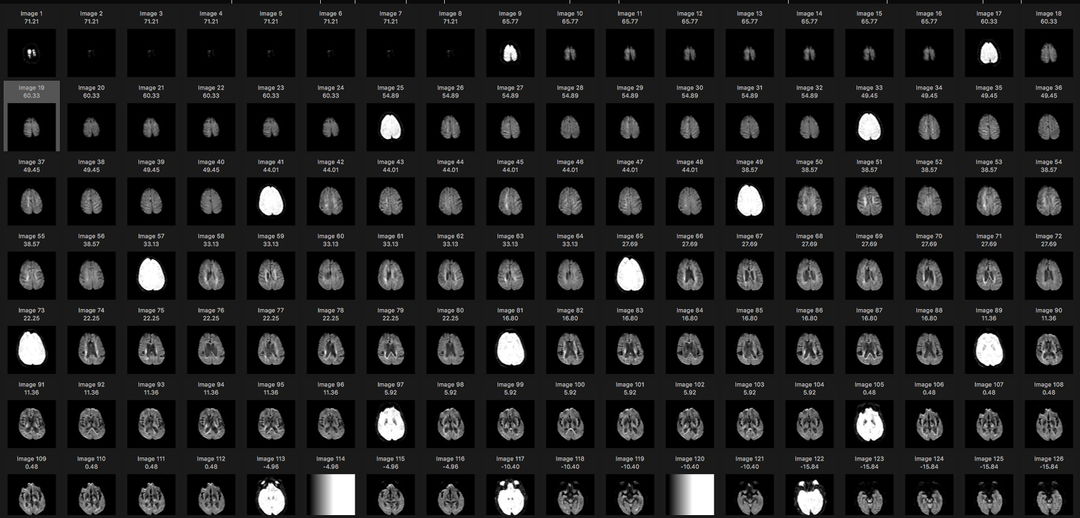
From the set of DICOM images select a set of images which represent a sequence of parallel slices taken at uniform spacing through the imaged volume. Each image in the set should have compatible (equivalent) imaging characteristics and image size.
2. Generating 3D Texture
- VolumeData node. The geometric size of the rendered volume is defined in the dimensions attribute of this node. This node combines volumetric data represented by a 3D texture (abstract node X3DTexture3DNode) and volume rendering style information as an abstract X3DVolumeRenderStyleNode
- ImageTextureAtlas is an X3DOM extension node. It is not part of the X3D v 3.3 standard but has the attributes required to be considered a descendand node of X3DTexture3DNode. This node contains an attribute url which is a link to a standard 2D image which through tiling contains a sequence of the 2D slices.
3. Creating X3DOM web content
Software
- Python 2.7 , with additional libraries
- Osirix-Lite : This free demo version of the Osirix software for viewing DICOM image files, for Mac OS. Similar DICOM viewers are available for Windows OS
Scans
The original data set was flat collection of DICOM files as provided on CD by a hospital. The contents of this folder were imported into the Osirix Lite viewing software. The viewing software organized the file set by patient name (there was only one patient) and into three series of scans. The thumbnail images for one such series is shown:
